How You Can Wear Your Wireless Microphone for the Best Audio and Appearance
Key considerations when miking actors, pastors and presenters
When it comes to body-worn microphones, there is no one-size-fits-all solution. The type of wireless microphone you choose will depend on a variety of factors, including the specific audio application it will be used for, the environment in which it will be used, and the user’s personal preferences. In this article, we’ll break down the multiple EMBRACE microphone wearing options and how they can be used to mic anyone from actors to pastors to presenters and more.
Getting the best audio signal
The most straightforward technique to achieve the optimal audio result is typically accomplished with a microphone element sitting roughly an inch from the mouth. But if mic proximity to the sound source were the sole requirement, we wouldn’t need miking experts! The fact is that attaining optimal audio performance is not the same as attaining the optimal production result. In the end, audio is one essential component that must integrate with any production’s visual and physical demands.
Which mic to choose
You are probably aware of the three most common styles of wireless body-worn microphones: headset microphone, lavalier microphone and single-earworn microphone. Each microphone wearing style addresses a specific set of needs such as hiding the mic for stage or camera, getting the microphone close to the mouth, or pleasing the mic user who has a specific preference. For audio professionals working with the end-user, fitting the microphone quickly and accurately and maintaining a full suite of readily available and pristine microphones can present additional logistical and financial challenges.
What if there could be a “Swiss Army knife” of microphones?
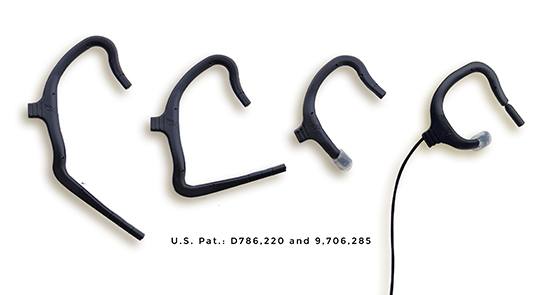
EMBRACE Microphones were designed to be more than just another body-worn microphone. Its patented mounting system with its “all-in-one” approach allows you to use it in three different configurations: a lapel lavalier, a single ear boom, or an on-ear “ear rig”.
Four common miking scenarios and what to consider when using EMBRACE
#1 Miking theatre actors of all ages
Theatre productions become feasts for the eyes: costumes, lighting, and props take center stage. Body-mics need to not detract from the performance so they typically need to be hidden while still optimized for sound clarity.
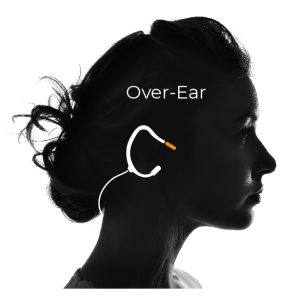
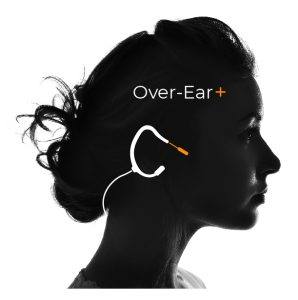
Recommendation: Over-Ear & Over-Ear+
Considerations:
- Hide underneath hair if possible
- Blend to skin tone by choosing one of three standard color options—or custom color it!
- The Over-ear design is the modern version of the handmade “ear rig” – no special tools required
- Earmount “locks” the mic in place to support active performances
- Trim and shape Earmount to custom fit it to practically any ear size
- In cases with “smaller” voices, extend mic element further out of the Earmount to bring it closer to the mouth for additional gain.
#2 Miking professional presenters on stage
The audio engineer may have much less time to plan in a corporate setting as it’s often unknown what attire presenters may be wearing. Clothing, jewelry and hairstyles can make lavalier clip-ons and headsets challenging to fit.
Recommendation: Over-Ear

Considerations:
- If you’re already clipping mics on the collar or lapel, the Over-ear is usually closer to the mouth so your audio signal may improve
- The Over-ear mic stays in pattern with head turns to keep audio levels consistent despite the movement
- No lapels or collars? No problem! Over-ear always ensures there’s a prime position for the microphone
- No guesswork: placing an EMBRACE over-ear takes only seconds by the audio pro or the presenters themselves
- With Over-ear, the mic cable goes down the back, making cable dressing a breeze.
#3 Miking professionals in studio
For broadcast situations where lavaliers are generally used, an Over-ear alternative combines the advantages of an easily hidden microphone that also mitigates clothing noise and drop-outs from head turns. Here, the choice of the element is highly important.
Recommendation: Over-Ear (with the right mic sensitivity)

Here are some general guidelines for choosing the mic sensitivity coupled with gain adjustments.
Considerations:
- When voice volume is low, choose high sensitivity!
- When voice volume is high, choose low sensitivity!
#4 Miking for acoustically challenging spaces
As attractive as an Over-ear solution may be, sometimes acoustic challenges don’t permit a mic to be too far away from the mouth. Houses of worship and multipurpose rooms can be examples of highly reverberant spaces that are challenging if the mic is further from the mouth.
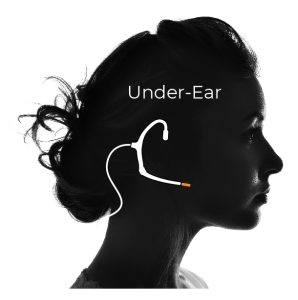
Recommendation: Under-Ear & Under-Ear+
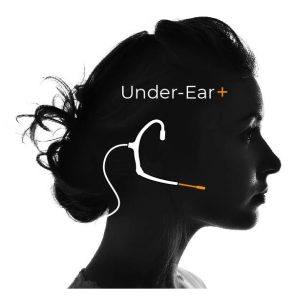
Considerations:
- Configure EMBRACE as a traditional Under-ear boom microphone to get it closer to the mouth
- The Under-ear configuration works better for larger ears and must be shaped to the user’s ear for a solid fit
- As with the Over-ear option, the mic element can be further extended out of the Earmount to get more gain
- Use a cardioid mic element with a windscreen in very high feedback environments to increase the gain before feedback ratio
There you have it! We hope you enjoyed our brief overview of the different microphone wearing options.
Get your hands on EMBRACE Microphones to create the mic style you want and need!

